Showing posts with label Eyes lips face. Show all posts

Easy Spring Makeup Tutorial!

Hello everyone!

I hope all my readers on the East Coast is enjoying the GORGEOUS weather that has finally arrived! To accompany it, I have a super easy spring makeup tutorial for you all! So, let's just get right into it!

So here's just an overview of the look:


As you can see, it's a very neutral eye and face look with a super pretty pop of color on the lips. That's what spring makeup means to me, a neutral look and a great pop of color! 

Here are all the products I used:


From left to right:

Eyes Lips Face Cosmetics Essential brushes:
- Professional Total Face Brush
- Professional Eyelash and Brow Wand
-Professional Eyeshadow Brush
- Professional Blending Eye Brush 

Individual compacts (all from ELF Cosmetics):
-Mineral Pressed Bronzer in "Caramel Cabana"
-Baked Eyeshadow in "Enchanted"
Baked Blush in "Peachy Cheeky"

The eyeshadow palette is from Hard Candy and is called "Birthday Suit"

The eyeshadow primer is ELF's Mineral Eyeshadow Primer

The mascara below it is my new favorite! It is ELF's (of course!) Lengthening and Volumizing Mascara 

The chubby lip pencil below the mascara is Rimmel London's Colour Rush Balm in "Sun-kissed"

The eyeliner below the lip color is Wet n' Wild's Color Icon Kohl Liner in "Calling Your Buff" 

On the right side of the palette are ELF brushes from their studio line:
- Angled Contour Brush
-Flat Eyeliner Brush


I know some makeup artists say not to do your eye makeup before your face makeup but today's look is super simple and doesn't involve foundation or anything messy so I switched things up!

Here's the order I used the eyeshadow in:


Please ignore my brows, they're so horrible right now!

The color I used as a base on my lid looks much paler because of the lighting I used but I reality is a beautiful pastel pink, perfect for a pretty neutral springtime/ Easter makeup look. You can see it a little bit better in the first picture. Oh and enjoy all the freckles I'm getting from the sunshine! No matter if I use sunscreen or not they come up at the first sign of spring!

I applied the light pink with the "Eyeshadow brush" and blended the light and dark brown in my crease with the "Blending Eye Brush". If I think that the opacity of the pink shadow was lost between all that blending I'll go back in and put on another layer. This just makes it so it looks more like a pretty pastel pink spring look and less like an everyday neutral look. Using the pink just makes it a little more special:) 

After I finish my eyeshadow, I curl my lashes and apply two coats of my ELF's Lengthening and Volumizing mascara! This mascara is super lengthening but not very volumizing so it's much better for an everyday look. If you want a mascara that would give you thick lashes for a special occasion or if you just like big lashes, this is not for you. Also this mascara is super dry, but it works so I don't mind!

I totally forgot to demonstrate in this picture that I also took the light brown color I used for "2" and smudged it in my lower lash line for a smokier look. I applied to my lower lash line with the flat eyeliner brush, I got as close to the lash line as possible. The nude eyeliner also comes into play here, I used it on my waterline to look more awake, I really needed it today! 

After I applied my eye makeup, I applied my face makeup. Like I said earlier, I didn't apply any foundation so I went straight for the contour!
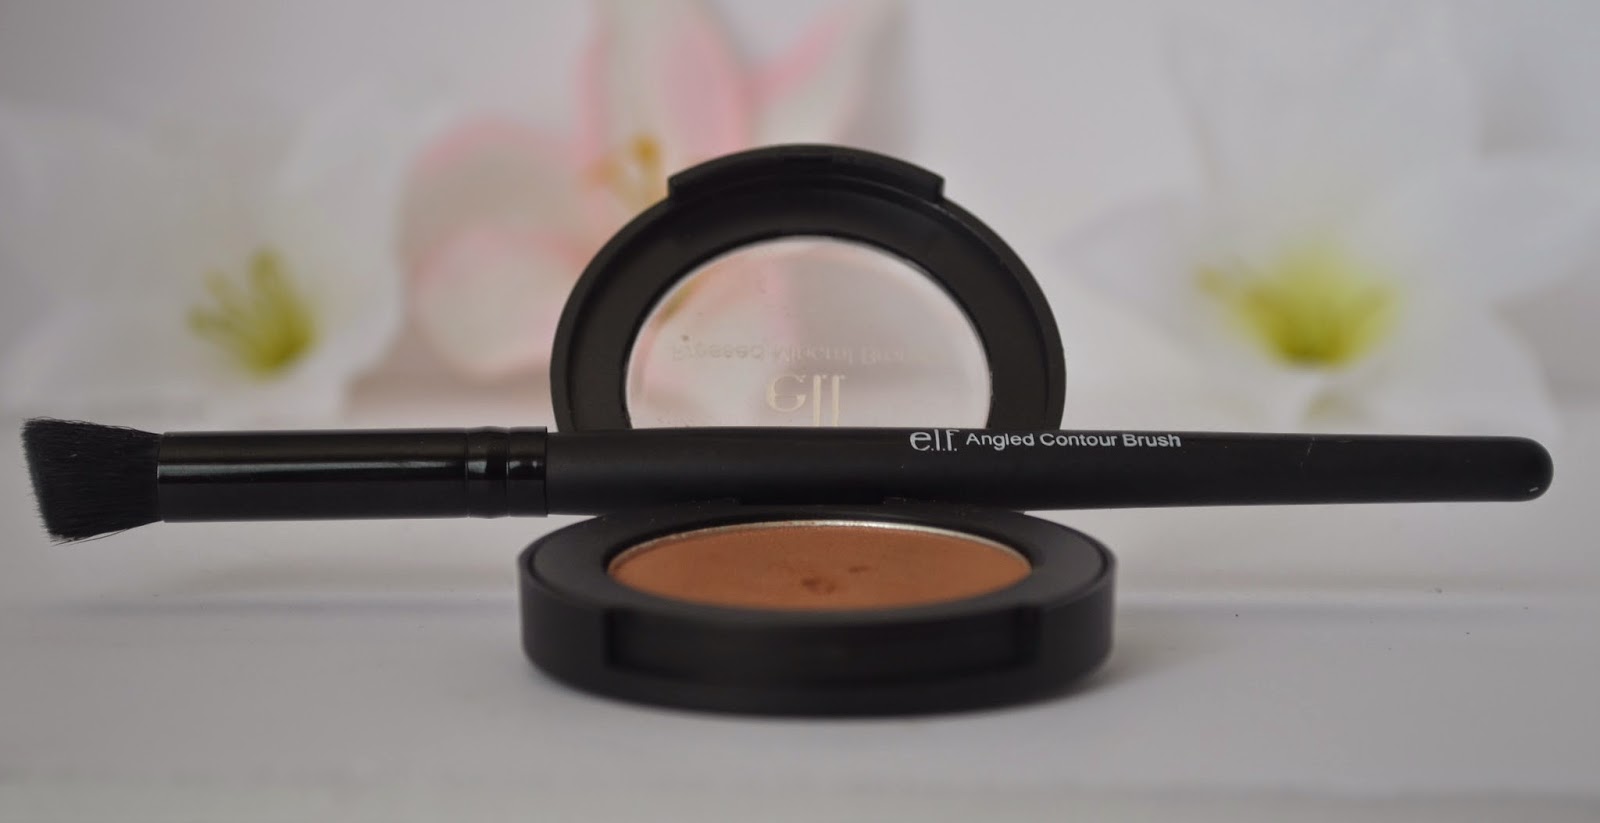

If you've been following me for a little while, you'll know that this is my current FAVORITE bronzer! It leaves a super natural finish and can be applied lightly or built depending on your preference. 

I first applied this with the "Angled Contour Brush" (pictured above) to the hollows of my cheeks, under my jawline, on my hairline, and down the sides of my nose. Then I took my super fluffy "Total Face Brush" and blended it until I was happy with how light and natural it looked! 

After contour, I applied blush and my baked eyeshadow super lightly as a highlight. I applied the blush to my cheeks and blended it towards my temples. 


Ignore the eyeshadow brush, I did not use this on my eyes for this look!

For the highlighter I applied it on the top of my cheekbones and blended it in the same direction as my blush. I applied it VERY lightly because the blush also has shimmer in it so I don't want to look like a sparkly clown!

Last but not least are the lips, if you didn't know this is my favorite part! Today I used my favorite coral color, Rimmel London's Colour Rush Balm in "Sun-Kissed"! I've recently put up a mini review of this color under my March Favorites so go check that out if you're interested:)

For this tutorial I didn't explain to you how to do my brows, mainly because I'm planning to do a separate tutorial for them but also because today they were insanely messy! 

Okay guys that's it for my tutorial on my favorite springtime/ Easter look! I've been having so much fun planning tutorials and posts for you guys! As always feel free to comment down below to leave requests or find me on my social media! Love you all:)

Xoxo,
Brig


My ikatehouse affiliate link: http://www.ikatehouse.com/?mw_aref=8161f5d154a17e1412f65b4eac1cd80e 
This company has many makeup brands for an affordable price, including NYX, L.A Girls, Jordana and more!

Eyes Lips Face Flawless Finish Foundation Review and Swatches!

Hello everyone!

As most of you know, I hauled a TON of ELF makeup a few months ago! I think that it has been a decent amount of time to test out the foundation I bought and tell you what I think about it. I know I used it in my last tutorial but I didn't tell you in depth what I think about it!


I bought this foundation in the color "Porcelain" for $6 which seems a bit pricey for ELF but in terms of drugstore prices, it's a pretty good deal for a  medium-full coverage foundation. Also, the color Porcelain isn't a porcelain shade at all..much more of a "light" shade.

As I said I bought the color Porcelain which has a very yellow undertone, comments from other ELF lovers have told me that shades darker than this one are very orange and just get worse the deeper the foundation shade is, so be aware of that if you want to try this foundation.

That being said, the yellow undertone of Porcelain works well for my skin tone! The coverage of this foundation is really good! One light base layer covers up a ton of my dark spots and undereye circles. As I said it is buildable, so another thin layer covers whats left of my dark spots without needing any concealer!

There are two ways I apply this foundation, depending on how much time I have. One way is to just use my fingers, dot it on my face and blend it in. The other is to pump the product onto the back of my hand, take some on a dense brush and buffer it in using circular motions. The "powder brush" from their studio line works very well! Also, if I don't like how it's applying on a particular day, I'll use a combo of these two methods, apply with my hands and blend with the brush.


The wear of this foundation is also very good, no matter how I apply it! I've worn it on days that I know are going to be LONG and it looks just as good as it did as it did 5 seconds after I applied it that morning! It doesn't oxidize or anything which I'm amazed at. When I first tried this foundation, I thought for sure it would oxidize, can't remember why now but....yeah.

Overall, I am in love with this foundation over any drugstore one I've tried. It doesn't cling to my dry patches, crease in my undereye area or make my pores look huge! If it wasn't already obvious, I highly recommend this product! This is how my face looks before with nothing on my face and after with one layer of product and nothing else on my face:

Before
After


Okay guys, that's all for my thoughts on ELF's Flawless Finish Foundation! Comment down below if you have a foundation that you think could beat this one and I may check it out! As always feel free to reach out to me on my social media, listed on the right side of my blog:)

Xoxo,
Brig


My ikatehouse affiliate link: http://www.ikatehouse.com/?mw_aref=8161f5d154a17e1412f65b4eac1cd80e

This company has many makeup brands for an affordable price, including NYX, L.A Girls, Jordana and more!

One Brand Full Face Tutorial Featuring Eyes Lips Face (E.L.F) Cosmetics!

Hello everyone!

Today I have a full face makeup tutorial using ONLY Eyes Lips Face (EL.F) products! If you don't know who ELF Cosmetics is, they are a vegan, cruelty free makeup brand that sells amazing quality makeup at a VERY low price! There's a lot of hype about them from many youtubers and other beauty blogs so if you want to know more, check them out! That's how I originally discovered the brand and I've never looked back!

Today's look is a pretty neutral, spring time look with a nice pop of color on my lips, so let's get into it!!

What I did first was wash my face with my Dickinson's face wash and Target brand apricot scrub to kill any dry patches that my foundation may stick to. I then used my new favorite Jafra dynamics hydrating moisturizer and let it sink in. Here's my bare face so you can see what I have to work with!

As you can see acne scars and discoloration from dry patches are ruling my face at the moment! ALSO PLEASE EXCUSE MY CRAZY HAIR! I just really wanted to get a post up for you guys and didn't think about my hair:)

Here's an overview of the products I used:


The first thing I do before I put any makeup on my face is apply my holy grail E.L.F Mineral Primer in Clear. I love this primer, it works really well. I even use it on days where I don't wear any other makeup! It keeps my dry skin at bay and helps the appearance of my pores.

After primer, I apply my E.L.F (duh!) Studio Flawless Finish Foundation in Porcelain. This foundation has a nice medium coverage, but it is buildable without getting cakey. Word of warning though, people have told me that the deeper shades have a orange tone to them so if you want to try this foundation, I would buy it from a store if possible and not from their website. That being said, this foundation isn't a traditional porcelain shade, it is at least a shade darker than porcelain and had a yellow undertone to it which luckily works well for me!

I usually apply the foundation with my hands but if I need it blend it more or just feel like using a brush, I use the E.L.F powder brush. This brush is super dense and blends everything from liquid foundations to blush and bronzer like a dream!!


Next I applied my eyelid primer, which also works really well as a lightweight concealer FYI! After eyelid primer, I applied my baked eyeshadow in Enchanted! This is a super nice golden color that is perfect for a low key look or a smokey eye! Any shadow I apply to my lid I apply with my E.L.F Professional Eyeshadow Brush. Their studio line also has a brush like this but I think it's called their C shaped brush, or something like that!


Since I don't own any matte eyeshadow shades from E.L.F, I used the same bronzer that I'm using on my face, in my crease! That's what I love about makeup, no rules! You can use bronzer as eyeshadow and lipstick as blush, it doesn't matter! :)


After my eyeshadow look is finished, I move on to eyeliner and mascara! The eyeliner I used is their Cream Eyeliner in Black. I didn't do anything special, just a simple look, no wing or anything. The mascara I used is their Lengthening and Volumizing Mascara in Black. Normally I would use a way more volumizing mascara but since this is a one brand tutorial, I used this one!


After eyeliner and mascara is brows! I usually use an eyeshadow from Hard Candy to fill in my brows because it looks more natural but today I used my E.L.F Eyebrow Kit in Light, which I think is a teeny bit too dark for me, especially for spring and summer! For special occasions though, this is really nice! The way I applied this is a little backwards because usually people use the wax and then the powder. I used the powder and then the wax because the powder is too light to set the wax which is darker. I find that it sits the same as if I set the wax with the powder.


After brows, I apply blush and bronzer! I don't do any intense contours, partly because I don't like the way they look, but mostly because I suck at it! I used their Baked Blush in Peachy Keen and their Studio Pressed Mineral Bronzer in Caramel Cabana. I applied the blush with a giant fluffy brush so I don't look like a clown when I'm done. I applied the bronzer with a tapered blush brush first and then blended it out with the same fluffy brush that I applied my blush with. I also used this bronzer to contour my nose, but this time I used their Studio Angled Contour Brush.


Last but not least is lipstick! I'm using a lipstick from their "essential" line in the shade Charming. This color is a very nice one for spring and summer! I apply a base layer and blend it out with my fingers to get the best look!


Okay guys, that's it for my one brand tutorial featuring E.L.F! I had so much fun doing this for you guys! There will be much more of these kinds of posts coming once school is done in a little over a month! I'm so excited for summer to start so I can interact with you and work on this blog more! I've had many blogs in the past and I just lost interest with all of them! But not this time!! I love you guys and I'm so grateful that you read my posts! I hope you all have a wonderful afternoon and as always feel free to comment down below or reach out to me on my social media listed on the right side of my blog!

Xoxo,
Brig


February 2015 Favorites!

Hello everyone!

Yes, it is that time of the month again...no not that one (lol)...it's that time for monthly favorites!! Oh my gosh, February went by so fast and I always think that and I don't think I'll ever get over the fact that February is so short! That being said, where the heck is summer?? I'm already over this semester and I just want to lay out in the sun and relax! Okay, enough for my whining, lets get into my favorites!

I don't think any of you know, because I have yet to get a good selfie, but I got my hair cut about a week ago and I am super committed to keeping it healthy so I'll have long gorgeous hair for the summer! They took off about 6 inches and I'm loving the layers and I'm gonna get it trimmed to keep them but I do want my long hair back. To do that I'm using my argan oil from Organix. I mentioned this in my hair care routine post and I still love it! I apply this from ear length to tip after showering, after heat styling and at night before bed after a long stressful day for my hair! I'm almost out of this and I'm definitely getting more of this. I originally bought this from Wal-mart for around $7 and I hope that it's the same price when I get it again!


My next February favorite a recent purchase but I love it! It is another hair product, this time a heat protectant. It is the Got2B Guardian Angel heat protectant. Like I said I'm really trying to keep my hair healthy and this stuff is definitely helping! Since my hair is shorter I've been straightening it more for a few reasons. 1.) it's easier to maintain throughout the day when it's straight, 2.) if I were to let my hair air dry right now, I'd have a white girl afro! and 3.) heat styling it and other way would take way too long in the morning! Using this product keeps my hair shiny, tangle free, and keeps my ends from drying out. The smell of it isn't the best but it's not bad and I'm getting used to it to the point where I kind of enjoy it now... is that weird? I don't know, let's move on! The only picture I have of this product is from my Instagram feed so I'll post it:


My next favorite is the Eyes Lips Face (E.L.F) baked eyeshadows! I did a review of these on my last post so I'm not going to say too much about them except for that they are amazing and for $3 awesome quality of both the product and the packaging!


My final favorite for February is a lipstick I picked up from Walmart. It is Dark Wine by Wet n Wild. It is kind of middle ground between a dark red and a vampy lip color, for those of you who either can't or won't wear super dark lips. It is literally what it says, a lip color that looks like wine! It's a super pretty semi-dark red. It is a seriously gorgeous color and I've been wearing it a ton, although I don't layer it on like I did for the swatch pictures! For a daily look, I apply some to the center of my lips and blend it out with my finger. By the way, Walmart has Wet n Wild products for a little bit cheaper than Walgreens, so when Walgreens isn't having a sale and I feel like checking out whats new from WnW I go to Walmart! Also it seems (at least in my area) that my Walgreens isn't up to date on what's new either which bugs me, but what can I do? lol and I'm so sorry about the crappy picture of the lipstick on the left, it's snowing like crazy here and I have NO natural light! I hope the lip swatch gives you a better idea of how nice the color is!


Anyways guys, I'm sorry that I didn't share a lot of stuff this month but not much has changed with routine because school's got me like (fill in the blank!). I hope you enjoyed this post and keep an eye out for my very first lipstick post (it will have lip swatches!). As always you can reach out to me on my social media, I comment back to everyone:)


Xoxo,
Brigette


Eyes Lips Face Baked Eyeshadow Reviews and Swatches!

Hello everyone!

I hope you're all having a wonderful day! I'm sorry I haven't been posting much on here! Being in college means I have a lot of papers and exams to study for so that means the blog has to go on hold during that time. Trust me I'd rather be playing with makeup than academic journals but if I did that I'd fail! Anyway I'm going to try to type posts in advance so I can post during busy times, but I can't make any promises :(

Today I have for you a review on the Eyes Lips Face Baked Eyeshadows that I reviewed a few weeks back. I only bought two but I think they are a good indication of the quality, especially since I've heard amazing things about them anyway!

The two shades I have are Enchanted and Bark.

Enchanted is a beautiful goldish peach color with a champagne sheen to it. I know that sounds super complicated but this color is so multidimensional that it requires a complicated explanation! This color is super pigmented and creamy! I was just holding it and almost dropped it. No joke, when I caught it my fingers were covered in eyeshadow so this eyeshadow should last me a while because I don't have to apply much at all before I reach the color I want. That being said, these shadows are really buildable! You can use them and have a subtle look or build them for a dramatic look!

The other color I bought is called Bark. This is a super pretty brown with a copper-like sheen to it! This color has a little bit more of a sheer pigmentation to it but it is also buildable. I say this color is much better used when wet. Baked products are supposed to be used wet anyway but I usually prefer them dry unless I'm getting ready for a special occasion. Below are the swatches. Enchanted looks more sparkly than Bark, but they both have the same finish. They are almost matte with a subtle sheen that really makes your eyes pop. When I'm having a low key makeup day, I'll apply Enchanted over my primer, throw on some mascara and that's it! It's one of my favorite looks because the gold in the shadow really makes my eyes pop and it takes under five minutes to complete.


Okay guys that's it for today's post! I hope you enjoyed it and I promise I will post more on here when I can. Thank you so much for reading and as always you can reach out to me on my social media!


Xoxo,
Brig


January 2015 favorites!

Hello everyone!


Welcome to my first "favorites" post! Since this is my first time doing this kind of post I'm just going to mention some of my beauty favorites. I'm sure my February favorites will be much more interesting since I just got a TON of new make up in the mail (haul coming soon!) but for now here's a nice quick post that I hope you all enjoy!

My first two favorites are some lippies! The gloss on the left is an ELF cosmetics product that arrived in the mail just yesterday but I can already tell that it's a favorite! It is called Brett from their Extra Lip Gloss line. It is a shimmery bright red.

 The lipstick is from L.A Colors and I bought it at dollar tree for (obviously) one dollar! I wasn't expecting much but boy was I surprised! The color is Mauve Glaze and is a "Your lips but better" color! When I apply one coat to one of my lips I can't even tell which has lipstick and which doesn't! Also it smells like vanilla which I don't mind but I know some people do.

The pigmentation of both of these products are amazing and last a long time! I do not pair these two together even though the swatches are next to each other:)


My next favorite for this  month is my all time favorite eyelid primer from ELF. It is in the shade sheer. They have changed the packaging since the last time I bought some and I like it so much more! It looks so much more high end, I especially love the new matte finish.

The color is slightly lighter, but the thickness and staying power is the same, awesome!

CORRECTION! I assumed that I had bought the ELF essential eyelid primer when I actually bought their new eyelid primer from their studio line. The studio primer is $3 but the essential one is $1. My bad!


Next is a holy grail brow product also from ELF (are we sensing a theme here?). It is their eyebrow kit in light. On the left is a wax that keeps my eyebrow hairs in place and on the right is a powder to set the wax if desired. I use this on an almost daily basis, the only days when I don't use it is when I don't bother to do my brows!


My final eye related product is Rimmel London's Scandaleyes mascara in black. It does amazing things for my lashes, gives major volume in one coat with no clumping! I get the waterproof version because my eyelids get really oily so with normal mascara I look like a racoon within a few hours!


My favorite face product for this month is L.A Colors "Cover Up!" concealer. I bought it at Family Dollar for around $2 and it is super full coverage! I use this mainly on my under-eyes because it is too thick to be applied on my blemishes because I have dry skin and the concealer sticks to it. Regardless this covers up my dark circles insanely well!


My final favorite is a blending brush from ELF. This was the first blending brush I've tried and I love it! I does what it says, blends my eye looks and for $1 it surpasses what I expected of it. I've never had any problems with it shedding and it picks up lots of product! I mean for such a low price, it's stupid to not give this brush a chance!


Okay guys, that's it for my January favorites! I hope you enjoyed it! As always feel free to comment down below or find me on my social media!

Xoxo,
Brig