Australis "AC on Tour" Contour and Highlight Kit Review!

Hello everyone!

I hope you're all having a wonderful day and enjoying some nice weather! Today I'm reviewing the Australis "AC on Tour" Contour Kit!

This kit looks a lot like the Anastasia Beverly Hills and the Kat Von D kit but at a much lower price!


You might be wondering how a US girl got her hands on an Australian brand product! I won this kit in a giveaway on Instagram but if you don't live somewhere that carries Australis products (like me) you can find their products on Ebay!

Let me just start this review off by saying that this kit is the first contour palette I've ever used and I'm so glad because it is amazing!

It is VERY pigmented so a little product goes a long way!

I wrote a long description about these powders in my Australian Beauty Haul post but if you don't feel like going back and reading that, I'll insert it below!

FYI: All of these powders are matte except for the highlighting powder I'll describe below!

The top of the kit has three powders for setting and highlighting.

In the top left is a peach colored powder which I use to set the concealer over my dark circles and then I top it off with a more neutral powder.

In the middle is a yellow powder which reminds me a lot of the Ben Nye Banana Powder that everyone raves about! I haven’t used this one yet because I’m not quite sure how to apply it! It looks a little funny on my skin tone but when I figure it out, I’ll Instagram my look, so if you want to see it, check out my profile, HINT HINT! 

The last shade in the top row is a BEAUTIFUL highlighting shade. It is a pink shade with a gorgeous sheen to it, no sparkles or glitter at all! Like the others, this powder is super blendable and leaves an airbrushed finish.


The bottom row is all contouring shades.

The first shade in the bottom left is a warm tan shade. This would be better for bronzing your face over contouring because it looks super natural and gives a great sun kissed look.

The middle shade is a cooler, ashy brown which I use to contour because it creates a shadow effect in the hollows of my cheeks, which is essentially what you want from a contour!

The last shade in the bottom right is a deeper version of the first contour shade. I’d say it’s about two shades darker with a little more red in it. This reminds me of my favorite ELF bronzer in Caramel Cabana but matte. I’m probably not going to get much use out of this shade because I am very fair and I don’t tan very much during the summer but I’ll play around and see!

Here's one last picture to help you seal the deal!

Took the picture this way to help it capture the light!


Overall, this kit is a great drugstore alternative to high end powders. It is also a great gateway product if you're new to makeup or contouring and would like to try something without worrying about wasting money if you don't like what you buy!

I hope you all give this kit a try and if you do let me know what you think below! As always please feel free to find me on my social media!

Xoxo,
Brig

My ikatehouse affiliate link: http://www.ikatehouse.com/?mw_aref=8161f5d154a17e1412f65b4eac1cd80e 

This company has many makeup brands for an affordable price, including NYX, L.A Girls, Jordana and more!

90's Tag!

Hello everyone!

Today I have a super easy read for all of you! It is the 90's tag, so it's a nostalgic throwback for all you other 90's babies!

 Okay, let's get into it!


1. Favorite TV show
Rugrats or Out of the Box


2. Favorite Toy
Barbie's Dream House


3. Favorite Commercial 
The Roseart one where the kinds used to surf on crayons


4. NSync or Backstreet Boys
Backstreet Boys


5. Weirdest Fashion Trend
Overalls but I was forced to wear them...


6. Favorite Collectables 
Beanie Babies or Hush Puppies


7. Favorite Beanie Baby 
My giant bear that my grandma got me as a baby


8. How many Tamagotchi's did you go through?
I wasn't really into Tamagotchi's but I went through two


9. Favorite Game Console + Game
Nintendo 64 and it's a tie between Zelda and Mario


10. Favorite Disney Channel Original Movie
Rip Girls and Brink!


11. Favorite Music Artist
I was really young in the 90's (I was born in 93) so the music I listened to was kiddie stuff like Mary Kate and Ashley Olsen! :) 


12. Favorite Nick Jr. show
Blue's Clues


13. Favorite Candy
Candy nacklaces or Wonderballs


14. Favorite Game (Board game, School game, etc.)
Snakes and Ladders or Hi Ho Cherry-o


15. Favorite McDonald's Happy Meal Toy
The Muppet Treasure Island toys that went in the bath


16. Favorite Book
Frog and Toad, any of the Magic Treehouse Books or Henry and Mudge 


17. Favorite Clothing Store
My mom did my shopping!


18. What would you watch when you'd get home from school?
Arthur and then ZOOM!


Okay guys, that's it for my 90's tag! I tag all of you to do this as well! It was a fun trip down memory lane:) 

As always feel free to reach out to me on my social media!

Xoxo,
Brig


This company has many makeup brands for an affordable price, including NYX, L.A Girls, Jordana and more!


I Won an Instagram Giveaway!?| Australian Beauty Haul

Hello everyone!

I’m baaaaaaack! I’m finally done with school and I am ready to have a new post for you all on a REGULAR basis, that is until classes start again in September…anyways let’s get into today’s post and not rush summer!

So a little while back I won a beauty giveaway on Instagram by one of my favorite accounts "Bubbalocchamakeuplover". She is from Australia and I was so excited to win because I've never tried out any Australian make up brands because I’m from the United States.


The first thing I opened when I received the package is the Australis “AC on Tour” Contouring and Highlighting Kit. I was so happy to win this with my prize because I've seen so many Australian beauty accounts rave about this on Instagram and was wishing I could own it!

*Be prepared for multiple pictures because I'm in LOVE with this kit!*


Inside it looks like the high end Anastasia contouring kit, but I’m guessing this one is much cheaper! The pigmentation of this kit is INCREDIBLE! I tap my brush into this so lightly and still have to tap off excess!

All of these powers are super smooth and blendable, which is good if you’re someone who doesn't like a super harsh contour. Also, they are all matte, if you have oily skin in the summer, then you’ll appreciate that!

The top of the kit has three powders for setting and highlighting.

In the top left is a peach colored powder which I use to set the concealer over my dark circles and then I top it off with a more neutral powder.

In the middle is a yellow powder which reminds me a lot of the Ben Nye Banana Powder that everyone raves about! I haven’t used this one yet because I’m not quite sure how to apply it! It looks a little funny on my skin tone but when I figure it out, I’ll Instagram my look, so if you want to see it, check out my profile, HINT HINT! 

The last shade in the top row is a BEAUTIFUL highlighting shade. It is a pink shade with a gorgeous sheen to it, no sparkles or glitter at all! Like the others, this powder is super blendable and leaves an airbrushed finish.

The bottom row is all contouring shades.

The first shade in the bottom left is a warm tan shade. This would be better for bronzing your face over contouring because it looks super natural and gives a great sunkissed look.

The middle shade is a cooler, ashy brown which I use to contour because it creates a shadow effect in the hollows of my cheeks, which is essentially what you want from a contour!

The last shade in the bottom right is a deeper version of the first contour shade. I’d say it’s about two shades darker with a little more red in it. This reminds me of my favorite ELF bronzer in Caramel Cabana but matte. I’m probably not going to get much use out of this shade because I am very fair and I don’t tan very much during the summer but I’ll play around and see!

Here's one last picture of the kit to make you fall deeply in love with it!


You might be wondering why I didn't put up swatches in this post and that is because I am going to post a review of this in about a week!

The next component of my prize is Maybelline’s Master Precise Liquid Liner in black. I’m not a huge fan of liquid liners because I always seem to mess it up, but this liner lets me create the tiniest line and gradually build it up! I still prefer my ELF Cream Eyeliner but sometimes I gravitate towards this a love it every time!


The next thing I won in the giveaway is two lippies by Australis. It is their Velourlips Matte Lip Creams. They are in the shades “NY-CEE” and “TOK-I-O”. Before I get into explaining them, I just want you to know that these are the Bomb.com!

They are super pigmented and smell like fruit punch, even hours after I apply them!


NY-CEE is a bright, classic red color. This is the one I wear because the other not my everyday style, but I’m hoping to use if for a Halloween tutorial! NY-CEE is my current favorite red and it lasts ALL day! Of course it does stain (my lips seem to absorb color!) but by morning it’s usually faded.

TOK-I-O is a super bright purple. This isn't something I wear everyday (or ever, really) but hopefully I can create some tutorials for Halloween with it. I've swatched this on my hand and left it overnight and it didn't budge! The lasting power of these lip creams are amazing!

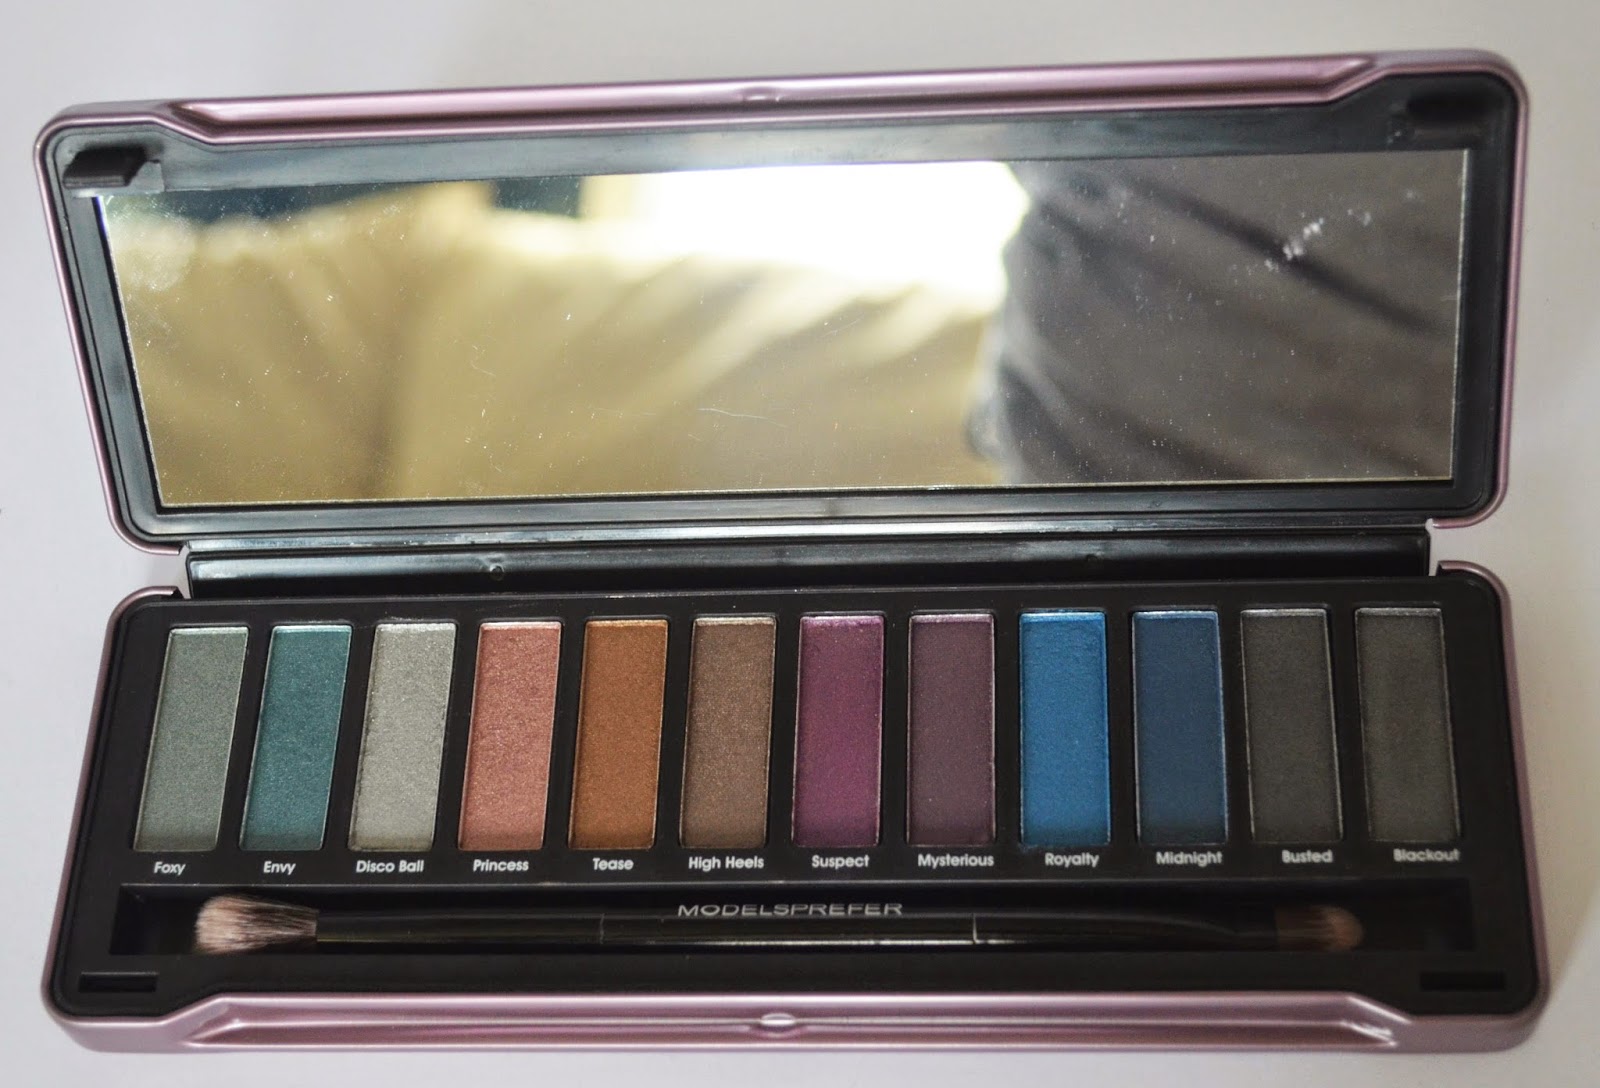
I also received an eyeshadow palette from Bubbaloochmakeuplover. It is the Party Glam palette from the brand MODELSPREFER. They are all shimmery, satin shadows in a beautiful range of colors.  I haven’t used this much because I really gravitate toward matte shadows, but so far my favorite color is “Tease”. It is a gorgeous copper brown which really highlights my eye color!


Last but not least I received a Maybelline Baby Lips Electro Pop in the shade Pink Shock. I’ve never tried any of the Baby Lips so I’m not sure if they’re moisturizing, but this one doesn’t leave my lip moisturized for very long.

That being said I still use it for the color! One swipe leaves a nice color on my lips that’s not too crazy for a “low key, hanging out in comfy clothes but still have to look presentable to run errands”, kind of day! *Disclaimer: guys I am so sorry, my computer lost the picture I took of this product so the one below isn't one that I took but I will replace it when I get the chance!! :)


Okay guys, that’s it for my Australian Beauty Giveaway Haul! I’m so thankful to Bubbaloochmakeuplover for hosting this giveaway, I love all my prizes! I hope you all have a wonderful day and if you’re lucky enough to already be out on summer break like I am, enjoy it!

Xoxo,
Brig


My ikatehouse affiliate link: http://www.ikatehouse.com/?mw_aref=8161f5d154a17e1412f65b4eac1cd80e 

This company has many makeup brands for an affordable price, including NYX, L.A Girls, Jordana and more!

Smokey Date Night Makeup Tutorial!

Hello everyone!

Before I start this tutorial I have a quick question for you. Does anyone who reads my blog also watch Revenge? I just started watching it and I am HOOKED! Comment down below and we'll chat, just please no spoilers!

Okay now for the tutorial! Here's a quick overview of the look and the products I used:


This time I started with my face because if I'm doing a look with winged eyeliner, I don't want to wreck it while I'm applying primer and foundation!

Not my pic! Found on ulta.com! 


I applied my Eyes Lips Face Mineral Face Primer as usual with my fingers, paying extra attention to dry patches and the area around my nose where my pores tend to be as big as black holes! 

For this tutorial I decided to give Revlon's Nearly Naked Foundation in Ivory another try (review coming soon!). This foundation is a shade too light for even my pale winter skin so bronzer and blush was a must for this look!
I used my usual favorite blush and bronzer, both by ELF. Thinking this in the tune of a broken record, the bronzer is their Mineral Pressed Bronzer in Caramel Cabana, and their Baked Blush in Peachy Cheeky.

After finishing my face, I moved onto my favorite place to experiment, my eyes!

First I prime my eyelids and undereye area with ELF's Mineral Eyeshadow Primer.


After I blend out the primer, I apply eyeshadows from my Hard Candy palette in this order:

First I apply the camel looking color in and just above my crease. Then I apply the light pink all over a lid. Third I apply the light brown shade all in my crease and blend it with the other colors. Then I apply the darkest brown on my outer-V and blend it slightly into the crease.

I find that after all that blending, the opacity of the pink shadow fades so I'll go back in and apply it on the lid. After I do that, I'll take the white color in the palette (which my camera didn't even pick up on) under my brow and in my inner corner. 

Once my shadow is done, I use ELF's (of course!) Cream Eyeliner in black to create a winged liner. I'm hoping to eventually do a tutorial on how I apply my winged liner so it looks great every time, but for now it shall remain a mystery! :)

As for my brows, all I do right now is take an angled eyeliner brush and use the same light brown that I used in my crease (#3) to fill them in. They really need to be touched up so I don't overfill them or else they'll look ridiculous!

Oh snap! I almost forgot to tell you all what I'm wearing on my lips! Today I picked Wet n Wild's Megalast lipstick in 901B "Think Pink". I think this was the perfect light pink to wear for this look! 


After I'm happy with my eyeliner, I curl my lashes and apply mascara. For this look I'm using my Rimmel London Scandaleyes mascara in waterproof black. I love using this mascara for more dramatic looks because it makes my lashes look almost like I'm wearing falsies! 

Here's one last look on this...look:


Okay guys, that's it for today's tutorial! Can you tell I'm obsessed with doing tutorials lately?? As always please find me on social media or comment below! 

Xoxo,
Brig


My ikatehouse affiliate link: http://www.ikatehouse.com/?mw_aref=8161f5d154a17e1412f65b4eac1cd80e 
This company has many makeup brands for an affordable price, including NYX, L.A Girls, Jordana and more!

Easy Spring Makeup Tutorial!

Hello everyone!

I hope all my readers on the East Coast is enjoying the GORGEOUS weather that has finally arrived! To accompany it, I have a super easy spring makeup tutorial for you all! So, let's just get right into it!

So here's just an overview of the look:


As you can see, it's a very neutral eye and face look with a super pretty pop of color on the lips. That's what spring makeup means to me, a neutral look and a great pop of color! 

Here are all the products I used:


From left to right:

Eyes Lips Face Cosmetics Essential brushes:
- Professional Total Face Brush
- Professional Eyelash and Brow Wand
-Professional Eyeshadow Brush
- Professional Blending Eye Brush 

Individual compacts (all from ELF Cosmetics):
-Mineral Pressed Bronzer in "Caramel Cabana"
-Baked Eyeshadow in "Enchanted"
Baked Blush in "Peachy Cheeky"

The eyeshadow palette is from Hard Candy and is called "Birthday Suit"

The eyeshadow primer is ELF's Mineral Eyeshadow Primer

The mascara below it is my new favorite! It is ELF's (of course!) Lengthening and Volumizing Mascara 

The chubby lip pencil below the mascara is Rimmel London's Colour Rush Balm in "Sun-kissed"

The eyeliner below the lip color is Wet n' Wild's Color Icon Kohl Liner in "Calling Your Buff" 

On the right side of the palette are ELF brushes from their studio line:
- Angled Contour Brush
-Flat Eyeliner Brush


I know some makeup artists say not to do your eye makeup before your face makeup but today's look is super simple and doesn't involve foundation or anything messy so I switched things up!

Here's the order I used the eyeshadow in:


Please ignore my brows, they're so horrible right now!

The color I used as a base on my lid looks much paler because of the lighting I used but I reality is a beautiful pastel pink, perfect for a pretty neutral springtime/ Easter makeup look. You can see it a little bit better in the first picture. Oh and enjoy all the freckles I'm getting from the sunshine! No matter if I use sunscreen or not they come up at the first sign of spring!

I applied the light pink with the "Eyeshadow brush" and blended the light and dark brown in my crease with the "Blending Eye Brush". If I think that the opacity of the pink shadow was lost between all that blending I'll go back in and put on another layer. This just makes it so it looks more like a pretty pastel pink spring look and less like an everyday neutral look. Using the pink just makes it a little more special:) 

After I finish my eyeshadow, I curl my lashes and apply two coats of my ELF's Lengthening and Volumizing mascara! This mascara is super lengthening but not very volumizing so it's much better for an everyday look. If you want a mascara that would give you thick lashes for a special occasion or if you just like big lashes, this is not for you. Also this mascara is super dry, but it works so I don't mind!

I totally forgot to demonstrate in this picture that I also took the light brown color I used for "2" and smudged it in my lower lash line for a smokier look. I applied to my lower lash line with the flat eyeliner brush, I got as close to the lash line as possible. The nude eyeliner also comes into play here, I used it on my waterline to look more awake, I really needed it today! 

After I applied my eye makeup, I applied my face makeup. Like I said earlier, I didn't apply any foundation so I went straight for the contour!


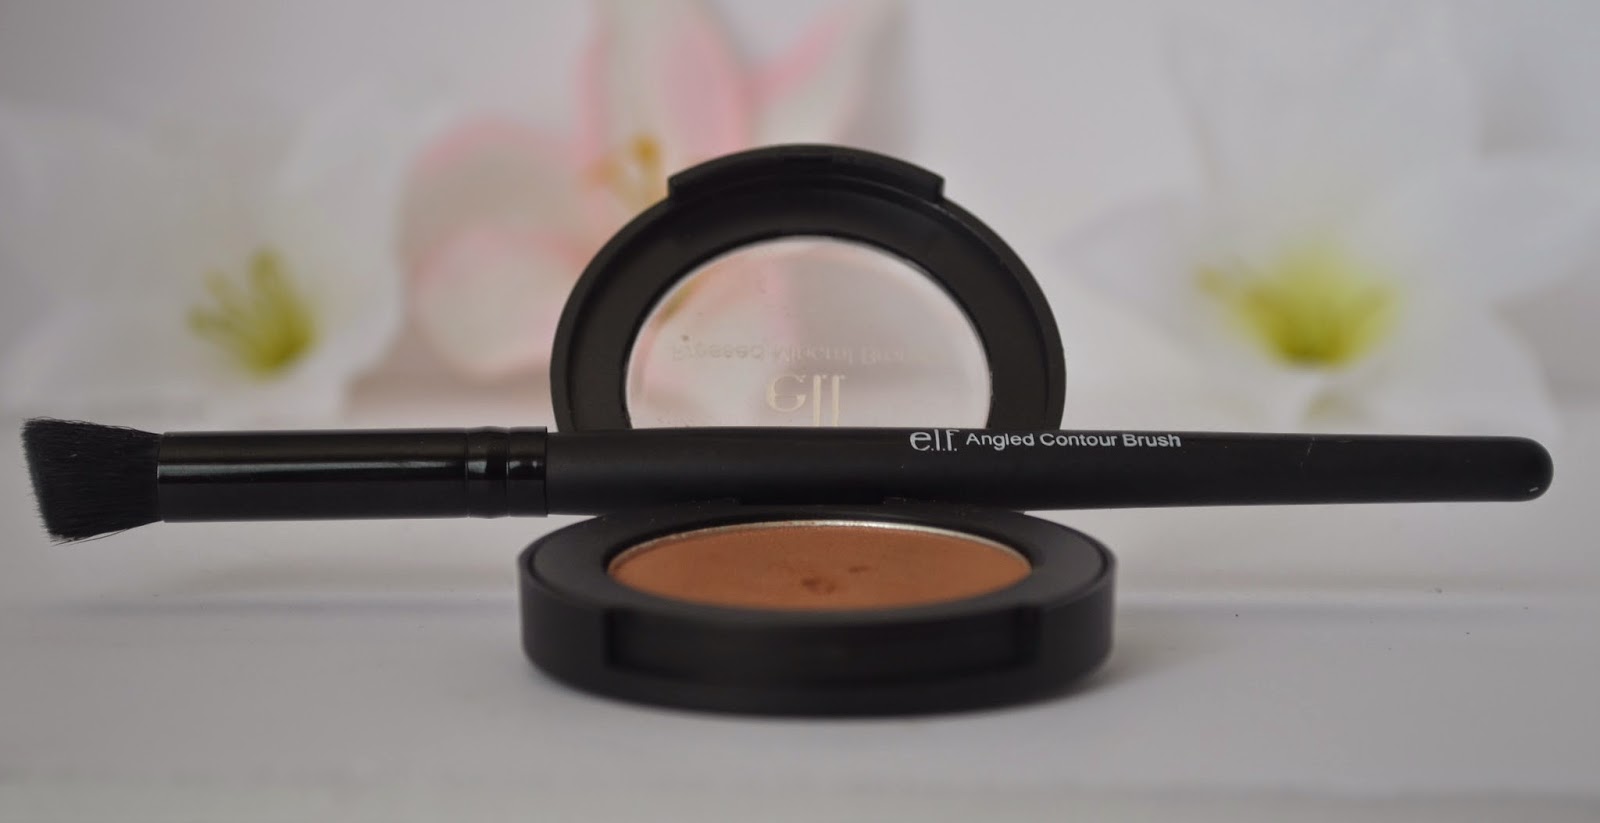
If you've been following me for a little while, you'll know that this is my current FAVORITE bronzer! It leaves a super natural finish and can be applied lightly or built depending on your preference. 

I first applied this with the "Angled Contour Brush" (pictured above) to the hollows of my cheeks, under my jawline, on my hairline, and down the sides of my nose. Then I took my super fluffy "Total Face Brush" and blended it until I was happy with how light and natural it looked! 

After contour, I applied blush and my baked eyeshadow super lightly as a highlight. I applied the blush to my cheeks and blended it towards my temples. 


Ignore the eyeshadow brush, I did not use this on my eyes for this look!

For the highlighter I applied it on the top of my cheekbones and blended it in the same direction as my blush. I applied it VERY lightly because the blush also has shimmer in it so I don't want to look like a sparkly clown!

Last but not least are the lips, if you didn't know this is my favorite part! Today I used my favorite coral color, Rimmel London's Colour Rush Balm in "Sun-Kissed"! I've recently put up a mini review of this color under my March Favorites so go check that out if you're interested:)

For this tutorial I didn't explain to you how to do my brows, mainly because I'm planning to do a separate tutorial for them but also because today they were insanely messy! 

Okay guys that's it for my tutorial on my favorite springtime/ Easter look! I've been having so much fun planning tutorials and posts for you guys! As always feel free to comment down below to leave requests or find me on my social media! Love you all:)

Xoxo,
Brig


My ikatehouse affiliate link: http://www.ikatehouse.com/?mw_aref=8161f5d154a17e1412f65b4eac1cd80e 
This company has many makeup brands for an affordable price, including NYX, L.A Girls, Jordana and more!