January 2015 favorites!

Hello everyone!


Welcome to my first "favorites" post! Since this is my first time doing this kind of post I'm just going to mention some of my beauty favorites. I'm sure my February favorites will be much more interesting since I just got a TON of new make up in the mail (haul coming soon!) but for now here's a nice quick post that I hope you all enjoy!

My first two favorites are some lippies! The gloss on the left is an ELF cosmetics product that arrived in the mail just yesterday but I can already tell that it's a favorite! It is called Brett from their Extra Lip Gloss line. It is a shimmery bright red.

 The lipstick is from L.A Colors and I bought it at dollar tree for (obviously) one dollar! I wasn't expecting much but boy was I surprised! The color is Mauve Glaze and is a "Your lips but better" color! When I apply one coat to one of my lips I can't even tell which has lipstick and which doesn't! Also it smells like vanilla which I don't mind but I know some people do.

The pigmentation of both of these products are amazing and last a long time! I do not pair these two together even though the swatches are next to each other:)


My next favorite for this  month is my all time favorite eyelid primer from ELF. It is in the shade sheer. They have changed the packaging since the last time I bought some and I like it so much more! It looks so much more high end, I especially love the new matte finish.

The color is slightly lighter, but the thickness and staying power is the same, awesome!

CORRECTION! I assumed that I had bought the ELF essential eyelid primer when I actually bought their new eyelid primer from their studio line. The studio primer is $3 but the essential one is $1. My bad!


Next is a holy grail brow product also from ELF (are we sensing a theme here?). It is their eyebrow kit in light. On the left is a wax that keeps my eyebrow hairs in place and on the right is a powder to set the wax if desired. I use this on an almost daily basis, the only days when I don't use it is when I don't bother to do my brows!


My final eye related product is Rimmel London's Scandaleyes mascara in black. It does amazing things for my lashes, gives major volume in one coat with no clumping! I get the waterproof version because my eyelids get really oily so with normal mascara I look like a racoon within a few hours!


My favorite face product for this month is L.A Colors "Cover Up!" concealer. I bought it at Family Dollar for around $2 and it is super full coverage! I use this mainly on my under-eyes because it is too thick to be applied on my blemishes because I have dry skin and the concealer sticks to it. Regardless this covers up my dark circles insanely well!


My final favorite is a blending brush from ELF. This was the first blending brush I've tried and I love it! I does what it says, blends my eye looks and for $1 it surpasses what I expected of it. I've never had any problems with it shedding and it picks up lots of product! I mean for such a low price, it's stupid to not give this brush a chance!


Okay guys, that's it for my January favorites! I hope you enjoyed it! As always feel free to comment down below or find me on my social media!

Xoxo,
Brig


Chocolate Chunk Cream Cheese Cookies!

Hello everyone!

I am back to bring you the best chocolate chip cookie recipe I have ever made! It is a variation on my mom’s infamous chocolate chip cookies. I added some cream cheese to the batter which makes the resulting cookie super light and creamy (and massively addictive, so you may want to make two batches!).

Here’s a little food porn to spark your interest before I move on to the recipe:


Okay now that I have you drooling, here are the ingredients:


1/2 cup (1 stick) unsalted butter, softened
1/4 cup cream cheese, softened (use cream cheese in a block or spreadable, don't use fat-free, light or whipped)
3/4 cup light brown sugar, packed
1/4 cup granulated sugar
1 large egg
2 teaspoons vanilla extract
2 1/4 cups all-purpose flour
2 teaspoons cornstarch (I omitted this and they turned out fine but you can use this if you want!)
1 teaspoon baking soda
1/4 teaspoon salt, optional and to taste
2 1/4 cups semi-sweet chocolate chips or chunks (I used a dark chocolate bar broken up into chunks!)

Directions:
  1. To the bowl of a stand mixer fitted with the paddle attachment, combine the butter, cream cheese (measure it by smooshing it into a 1/4-cup measure), sugars, egg, vanilla, and beat on medium-high speed until well-creamed, light and fluffy, about 5 minutes (or use an electric hand mixer and beat for at least 7 minutes).
  2. Stop, scrape down the sides of the bowl, and add the flour, cornstarch, baking soda, optional salt, and mix until just combined, about 1 minute.
  3. Add chocolate chips and chunks, and beat momentarily to incorporate, or fold in by hand.
  4. Using a medium 2-inch cookie scoop, form heaping mounds (I made 28). Place mounds on a large plate, flatten mounds slightly with your palm, cover with plasticwrap, and refrigerate for at least 2 hours, or up to 5 days, before baking. Do not bake with warm dough because cookies will spread and bake thinner and flatter.
  5. Preheat oven to 350F, line a baking sheet with a Silpat Non-Stick Baking Mat or spray with cooking spray and place mounds on baking sheet, spaced at least 2 inches apart (I bake 8 cookies per sheet). Bake for 8 to 9 minutes, or until edges have set and tops are just beginning to set, even if slightly undercooked, pale and glossy in the center. Do not bake longer than 10 minutes as cookies will firm up as they cool (The cookies shown in the photos were baked with dough that had been chilled overnight, allowed to come to room temp for 15 minutes, and were baked for 8 minutes, with trays rotated at the 4-minute mark. They have chewy edges with soft, pillowy centers). Allow cookies to cool on the baking sheet for 5 minutes before removing and transferring to a rack to finish cooling.
  6. Cookies will keep airtight at room temperature for up to 1 week, or in the freezer for up to 3 months. Alternatively, unbaked cookie dough can be stored airtight in the refrigerator for up to 5 days, so consider baking only as many cookies as desired and save the remaining dough to be baked in the future when desired.
 I did a little experiement with these cookies. I wanted to see how the dough would bake with and without chilling in the fridge. 

Here's how they bake with no chilling:
Ignore the blackened pan, this baking sheet is an old air bake sheet and it makes the PERFECT cookies!

 Here's how they bake with a little bit of chilling time:


Clearly there's a big difference in the thickness of the cookies between the ones chilled and the ones not but once they cool a little they look and taste exactly the same! So you can either get instant gratification and bake them right after mixing or be patient and chill them in the fridge.

Here's some more pics before I end this post!


Okay guys that is the recipe for what I think are the greatest chocolate chunk cookies I’ve ever eaten! If you make these cookies please send me a picture telling me how you liked them! As always you should feel free to reach out to me on my social media. I hope you all have a wonderful day- remember that you have to play nice with the other kids unless the other kids want to fight, then you have to kick the other kid’s butt! If you didn’t know what that was from, it was from Mulan (Mushu said it to Mulan in her tent before her first day of training). Just a little throwback for all you 90's kids!

Xoxo,
Brig

DIY Brush Cleaning Tablet With a Hot Glue Gun!

Hello everyone!

Today is a quick and easy DIY for all my beauties who need to clean their brushes cleaned! It is a super easy project that only requires a plastic clipboard and a hot glue gun!

Basically all you need to do is make dots and random lines with your glue gun on the clipboard and let it dry!


Here's what mine looks like:


Once your clipboard is completely dry, all you need to do is gather up all of your dirty brushes, put the clipboard into the sink with a little soap and run your brushes up and down the clipboard to remove all of the dirt from your brushes! After you think you gotten all the dirt, just rinse your brushes and let them dry!  It's seriously that easy!

Okay guys, that's it for today's post! Please let me know if you recreate this and how it worked for you! As always feel free to reach out to me in the comments or on my social media! Have a wonderful day!

Xoxo,
Brig


Disclaimer: I have been accepted as a Target affiliate! This doesn't affect my opinion of anything I purchase from their stores or my opinion on their REDcard credit program. It's a great credit card option that saves you 5% everytime you shop and you get extra return time if you rethink a purchase! To top it all off you get free shipping from target.com!  http://goto.target.com/c/130274/99528/2092 


TMI Tag!

 Hello everyone!

Today I have a nice easy post for you to read. It's the TMI tag that was on YouTube for a long time. I took it and changed two of the questions so it asks about my blog instead of a YouTube channel that I don't have! I hope you enjoyed learning some more things about me!

1: What are you wearing?
A black cami from target and aeropostale sweatpants. It's a super casual kind of day today!

2: Ever been in love?
No, but I hear it's amazing.

3: Ever had a terrible breakup?
The last bad breakup I had was when I was at the ripe old age of 14.

4: How tall are you?
 Five feet one and three quarters inch tall. The three quarters counts for a lot when you're under 5'3" lol

5: How much do you weigh?
115 pounds.

6: Any tattoos?
No but I want a small heart on my wrist.

7: Any piercings?
Just my ears but I want to get my nose done.

8: OTP?
It's a tie between Spoby and Ezria  from Pretty Little Liars.

9: Favorite show?
Pretty Little Liars, Bones, Supernatural, Charmed, Awkward, the list could go on forever!

10: Favorite bands?
Most of the music I like is from single artists but some bands are The 1975 and Fall out Boy (the old stuff).

11: Something you miss?
 My old dog, my sister who I never see, kindergarten, recess, snack time, basically just being a little kid with no worries or responsibilities besides putting away my toys.

12: Favorite song?
The Heart Wants What it Wants by Selena Gomez.

13: How old are you?
 I am 21 years old.

14: Zodiac sign?
Leo.

15: Quality you look for in a partner?
He has to be able to make me laugh and laugh at himself, understanding of my beliefs and values, and love animals.

16: Favorite Quote?
Everyday may not be good but there's something good in everyday.

17: Favorite actor?
A tie between Jennifer Lawrence and Emma Watson.

18: Favorite color?
Mint green.

19: Loud music or soft?
Depends on where I am. If I'm alone then loud. If I'm not alone then either soft or loud with headphones in.

20: Where do you go when you’re sad?
Straight to my bed.

21: How long does it take you to shower?
Depends on if I'm in a rush, 10-30 minutes.

22: How long does it take you to get ready in the morning?
About an hour.

23: Ever been in a physical fight?
Nope.

24: Turn on?
Nice eyes and nice smile.

25: Turn off?
Smoking.

26: The reason I started my blog?
I started my blog because I love all beauty related items and I love to write so I thought I should write about things that I love.

27: Fears?
Heights, spiders, bees, escalators, small spaces.

28: Last thing that made you cry?
I stubbed my toe.

29: Last time you said you loved someone?
To my mom before she went to bed last night.

30: Meaning behind your blog name?
Well my nickname is Brig and it's about my life so I called my blog "My Life as Brig".

31: Last book you read?
Winesburg, Ohio by Sherwood Anderson.

32: The book you’re currently reading?
I'm not reading anything right now unless it's for school :(

33: Last show you watched?
I caught up on Pretty Little Liars.

34: Last person you talked to?
My brother.

35: The relationship between you and the person you last texted?
The other teaching assistants I'm working with at school.

36: Favorite food?
I really want to say something healthy like salad but really freaking love pizza!

37: Place you want to visit?
Everywhere.

38: Last place you were?
My kitchen.

39: Do you have a crush?
Not right now.

40: Last time you kissed someone?
Besides family, my ex a few months ago (before we broke up, I'm not one to go back to my ex when I'm lonely)

41: Last time you were insulted?
I don't get insulted very easily so I don't remember

42: Favorite flavor of sweet?
Chocolate!!!

43: What instruments do you play?
I used to play flute but I quit in 8th grade. I've always wanted to try guitar and piano

44: Favorite piece of jewelery?
My small ring that my mom gave me

45: Last sport you played?
Horseback riding is my sport and if you don't think that it's a sport then get off my blog!

46: Last song you sang?
Me and my friends sang "Since U Been Gone" by Kelly Clarkson last night, it was a fun time!

47: Favorite chat up line?
Did it hurt when you fell from heaven?

48: Have you ever used it?
Nope

49: Last time you hung out with anyone?
Last night

50: Who should answer these questions next?
Everyone!

Okay guys, that it's for today's post, I hope you enjoyed it! As always feel free to reach out to me if you think I would enjoy a product you found or if  you want to review something!

Xoxo,
Brig


Disclaimer: I have been accepted as a Target affiliate! This doesn't affect my opinion of anything I purchase from their stores or my opinion on their REDcard credit program. It's a great credit card option that saves you 5% everytime you shop and you get extra return time if you rethink a purchase! To top it all off you get free shipping from target.com!  http://goto.target.com/c/130274/99528/2092 

My "Famous" Banana Muffins!

Hello everyone!

The freezing rain has finally stopped and the sun has come out to play! At this very second I have a recipe to share with you all in the oven. They are my “Famous Banana Muffins”. I don’t make this all the time but when I do, my family requests I make them in bulk, not joking! I don’t even post that I’m making these on facebook or else I’ll have to make them for extended family and friends as well and if I did that, my local market would be out of bananas…

This recipe is super easy and kid friendly! It also doesn’t use very much of your baking staples (eggs, flour, butter, etc.) so if you have a day full of baking then you won’t have to worry about running out of ingredients before you make a yummy batch of brownies.

The ingredients are:
3 mashed bananas
1/3 cup melted butter
1 egg
1 tsp baking soda
1 tsp baking powder
1/3 cup white sugar (I  used a little less because I like a strong banana taste)
1 ½ cups flour
½ tsp salt

HINT: If you have little ones, let them mash up the bananas in a bowl with a fork, spoon, or even their hands (with or without gloves, totally your preference!) This will make them feel like they’re helping without doing anything complicated!

After you have all the ingredients laid out, the process of mixing and folding is super easy! All you have to do in sift together the dry ingredients (flour, baking soda, baking powder, and salt) into a small bowl and set aside. Then in a large bowl mix together the mashed bananas, egg, sugar, and melted butter until combined. Pour the flour mixture little by little into the wet ingredients and fold them in. Folding them as opposed to using a mixer makes the muffins light and fluffy! Once everything is combined, pour the mixture into greased muffin tins. The amount you fill them totally depends on you. I filled mine to the top to make six large muffins, but you could make 12 smaller ones as well! Large muffins back for about 25 minutes and small muffins back for about 15 minutes on 350 degrees.

If the baking gods are looking down on you with delight then your muffins should look like this when they're done:


And that’s it! You could add other ingredients to this recipe as well such as brown sugar, vanilla, or walnuts; the choices are totally up to you! For this post I went nice and simple but I would normally add vanilla and cinnamon because it really brings out the banana flavor.

Okay guys, that’s it for today’s post! I hope you enjoyed it and I hope you make this recipe and add your own spin on it! Please comment below if you liked it and send me pictures on my Instagram! I hope you all have a great afternoon!

Xoxo,
Brig


Disclaimer: I have been accepted as a Target affiliate! This doesn't affect my opinion of anything I purchase from their stores or my opinion on their REDcard credit program. It's a great credit card option that saves you 5% everytime you shop and you get extra return time if you rethink a purchase! To top it all off you get free shipping from target.com!  http://goto.target.com/c/130274/99528/2092 

Easy Peasy Peanut Butter Cookies!

Hello Everyone!

It’s another dark and gloomy day outside at Mylifeasbrig Headquarters so I thought I would do some baking, except I didn’t have many ingredients to work with. I had no milk, one egg, very little butter and no brown sugar! In case you're worried about how I live, I do my grocery shopping on Fridays, for no apparent reason! 

Anyway, I thought baking would be impossible; WRONG-O! I found an old cookbook (from 1990, so it’s practically ancient) of my mom’s titled “4 Ingredient Cookbook”. I checked the index and voila! There was a few recipes for peanut butter cookies.

Today I am sharing with you how I took that recipe and with a few changes, made it so much better! I’m calling these cookies my “Easy Peasy Peanut Butter Cookies”, patent pending….(not really).

Here's a little preview to keep you interested:


Okay now that you're drooling on your laptop, here are the original ingredients:
   1 cup chunky PB
   1 egg
   1 cup  sugar
   1 tsp  vanilla

And that’s it! How did they expect for peanut butter cookies to come out magically delicious with only four ingredients, I will never know!

Here’s what I used to shake things up:
   1 cup  of smooth PB
   1 egg
   A little less than a cup of sugar (I don’t like things overly sweet, but you can use the whole cup if you prefer)
   1 tsp vanilla
   1 tsp baking soda
   A sprinkle of flour (to bind the batter a bit more because I found the batter to be very wet)

Even though this recipe is no longer four ingredients, it’s still just as easy to prepare. I literally just put all of these ingredients into a small mixing bowl and mixed with a SPOON! NO ELECTRIC MIXER NEEDED! 

After all the ingredients are combined I formed the batter into 1 inch balls and placed on a greased baking sheet. Before I put them in the oven I pressed them down with a fork so it formed a crisscross pattern. 

These cookies bake at 350 degrees for a very strict 10 minutes. If I had left them in the oven any longer, I wouldn’t have anything to write about today! If you did it all right, (and I don't see how you can screw this up!) they should look like this: 


Okay guys, that’s it for today’s post! I hope you all enjoyed and as always you can leave a comment down below and I will definitely respond, because well, I have no life! Please share this with anyone you know who likes to bake, love peanut butter or both! 

Also, don’t forget to check out my social media, especially Instagram (I live for Instagram, lol!)

Xoxo,
Brig


My manicure routine!

Hello everyone!

Today is a gloomy day where I love so I thought I would show what I use for my manicures. For this tutorial I'm using my favorite polish combination, but you could use anything you want, even add some nail art! 

After I clean my nails from my previous polish color, here's what I use:


1. Once my nails are all clean, I file my tips a clip any hang nail or torn cuticles.

2. Then I use my Revlon crazy shine- to use this, I file the tops of your nails an then use the foam side to make my nails shiny and healthy looking. I find that using this helps my base coat stick better.

3. Then I apply a very generous amount of Burt's Bees lotion and wait for it to absorb. 


4. After the lotion is absorbed, I apply my Revlon treat and boost base coat. 


5. After my base coat dries, I apply 2 coats of Pure Ice "I'll Never Tell". This polish is dark brown with some silver and copper micro glitter in it. It's so gorgeous and reminds me of Pretty Little Liars (probably because of the name!)


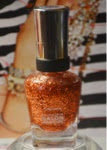
6. Once the second coat of "I'll Never Tell" has dried, I apply one coat of Sally Hansens Complete Salon Manicure in "Copper Penny". 


7. The final step to my manicure routine is applying Rimmel London's Base Coat and Top Coat Pro. This top coat gives awesome shine and smoothes out the texture from the glitter. After the top coat has dried, I clean up around the edges of my nails and cuticles, which gives a result like this:


Okay guys that's all for today's post! I hope you enjoyed seeing what I use each time I give myself a manicure (minus the colors, those change a lot!). As always if you have anything you want me to post or if you just want to say hello, I reply to all comments! I hope you all have a great afternoon!

Xoxo,
Brig 


My Everyday Makeup Tutorial!

Hello everyone!

I hope you're having a wonderful afternoon. Today's post is going to be a picture tutorial of my everyday make up look (with a slightly more dramatic than planned winged eyeliner). Hope you enjoy!


To complete this look I used my Hard Candy palette in Birthday Suit (I have a review of this on another post!), my Rimmel Londom Scandaleyes eyeliner in black, Rimmel London Scandaleyes mascara in black, some ELF brushes (but you can use any for this look), LA Colors concealer stick and my favorite ELF primer. You'll notice I don't use foundation, I don't like using foundation everyday or really ever, but I wear it for special occasions or if my skin is particularly bad that day. If not, I stick to concealer.

This is what I look like when I wake up, before I wash my face. Notice the awful semi-healed acne right in the center between my eyes...worst part of sensitive skin is acne scars!

After I wash and moisturize my face I bust out my fav matte shadow palette and apply it in this order:


 Applying them in this order creates a look like this:


Once im done with my eyeshadow I'll either just put on some mascara or do a winged eyeliner like this:

It's a little uneven today but I evened it out with my concealer stick. This stick from LA Colors is really good at making a precise line and it has very full coverage! I get mine from Family Dollar for around $2-3. 

Okay as a reminder here's what I look like before and after to show how great these products are at transforming my skin without foundation! 


Okay guys, I hope you enjoyed this tutorial! As always if you want me to review anything, have a tutorial idea  or if you just want to say hello, please don't hesitate to leave a comment! I reply to all of them:)

Xoxo,
Brig